Unity Basics - Install and Startup
Looking for help installing and setting up a Unity for the first time or just need a refresher on the editor? Then this is the guide for you! This guide is tailored to what you experience as a first time unity user.
Goals
- Set up a Unity account with free license
- Install Unity
- Create a new unity project
- Start to get familiar with what we’re looking at
Installing Unity
I’m going to assume we’re starting from absolutely nothing! Our first order of business before we can get started fiddling around with the game engine is going to be downloading it in the first place.
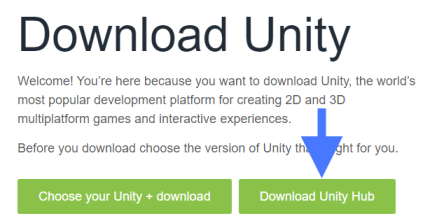
Unity helpfully provides a version selection and wrangling tool called Unity Hub. This lets us set up and install multiple versions of unity, access resources, and see a list of our projects in one place - so lets select the ‘Download Unity Hub’ button.
Go ahead and install the application - the default location it chooses is just fine. Go ahead and launch unity hub.
You’ll likely see a notification at the bottom about not having a valid license - that’s alright! Personal use licenses for Unity are free so long as you’re not making over $100,000 a year using unity for personal or small business uses. We’ll fix this situation by creating an account and logging in.
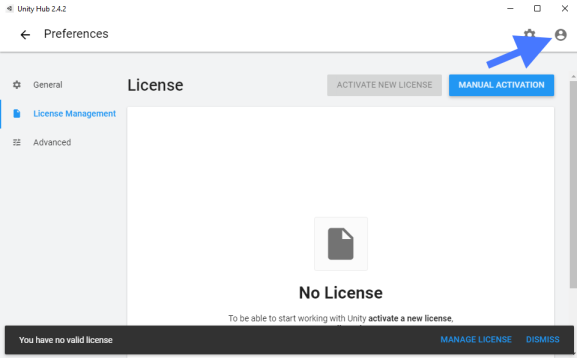
Select the account icon and sign in by either going through the process of creating a new account, linking a third party account, or logging into an existing account. It makes no difference to Unity if you use a 3rd party account as your sign in or make a new one - but either way, ensure you’re signed in before continuing to the next step. You’ll know you’re signed in because you’ll see your initials in the upper right of Unity Hub instead of the generic person icon.

Now, we’ll head to the license management section. If Unity Hub didn’t open to it by default, you can either click on Manage Licenses on the notification if it’s still up, or select the settings cog and then choose License Management. We’ll then select Activate New License, and choose Unity Personal. Select the description of what best applies to you, and click done. You’re now set to get untiy installed and set up!
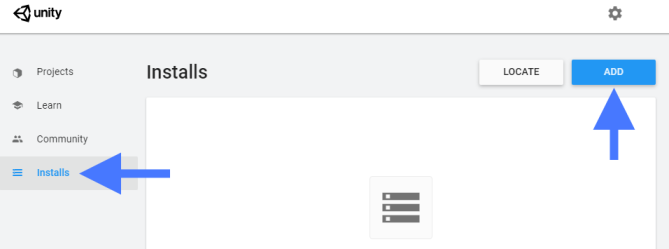
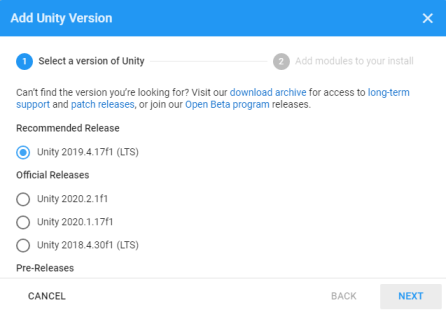
Head back to the main unity hub page, select the installs section, and then click on the add button. A version selection window will pop up - if you know you need a specific version because a tutorial or something told you to get it, you can head to the version archive link to get exactly what you’re after. Otherwise, the recommended LTS version provided is generally the safest choice. Select ‘Next’ to move on to the module selection screen.
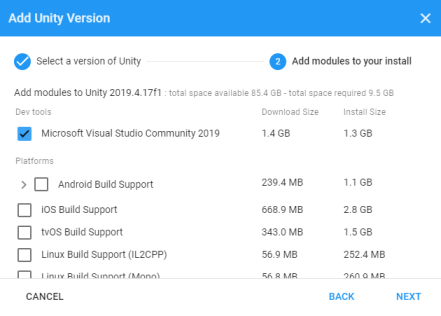
By default, Unity will select the minimum required number of modules to install on your system, and generally also the documentation which is nice. In addition, It’ll select “Microsoft Visual Studio Community” on Windows, which we’ll want to install. If you’re reviewing this guide later to install another version or you already have the visual studio version specified on your computer, you can uncheck the box. If in doubt, leaving the box checked won’t harm anything.
Later, if you’re looking to install modules to make it easy to put your game on, say, iOS or android, you can head back to the installs section of untiy hub and modify the modules of your untiy install. Once you’ve confirmed your selections, click next and go through the install process.
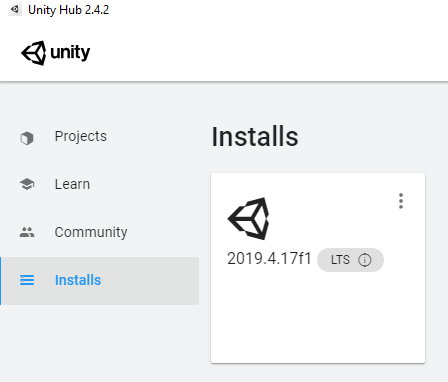
It’ll take a bit and a separate install window for visual studio will probably pop up, but once everything is finished, your installs section should look something like above! If that all looks good, then you’re now ready to create Unity projects!
Creating a Unity Project
There are two options we’ll discuss for creating a unity project - using a premade educational refernece or creating your own project. This depends on your learning preferences, and it doesn’t hurt to explore both options. It’s nice to be able to reference an exising project to see how you can do something, and you can find these premade projects and some tutorials in the Learn section!
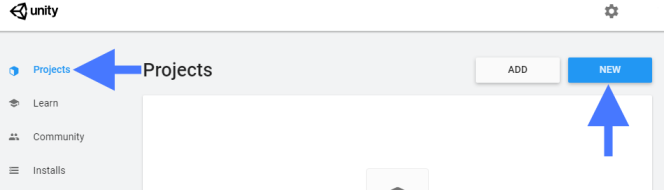
For this guide however, we’ll be using an empty project. Start by making your way to the projects tab in Unity Hub, and select the ‘new’ button.
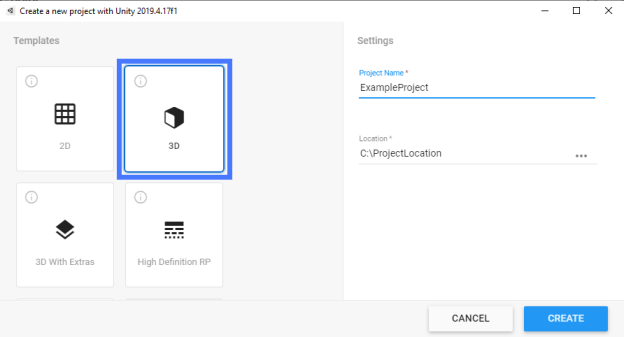
Already there are a variety of options - which one do we choose? Well, no worries. It doesn’t matter which one you choose really, all the choices do is impact some defaults for how your project shows things to your user and to you while you edit. Unless you have a specific set of defaults in mind, I’d recommend choosing 3D project by default regardless of your project contents. Let unity load up, and you’ll be presented with the editor!
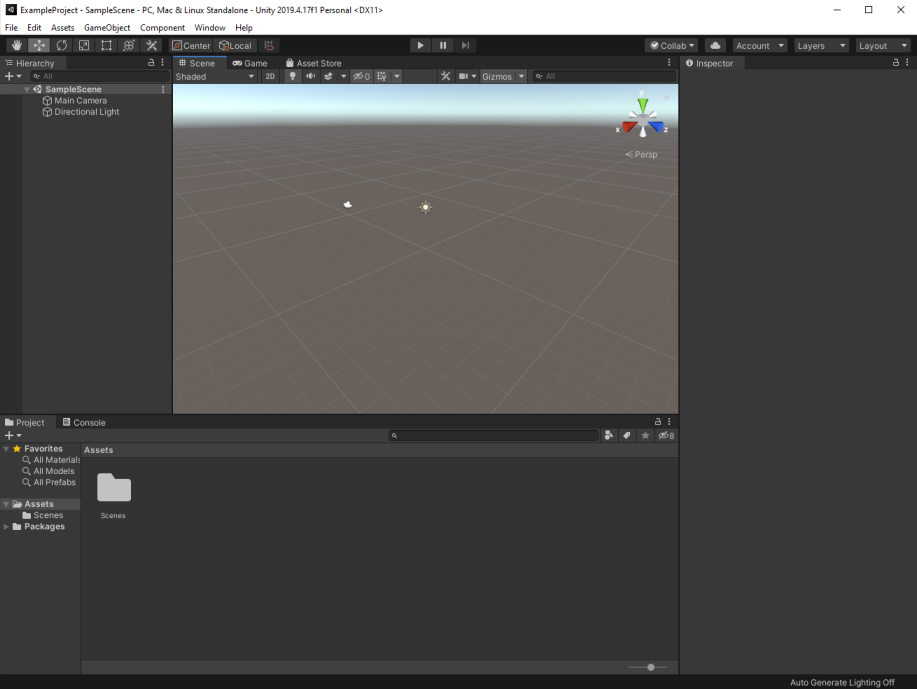
Awesome! We’re in, and unity is set up. Now for some basic information to help you navigate around this pile of buttons.
A brisk walk around unity
The editor can be a bit intimidating at first, but I find it best to provide a rough overview of the larger sections and not get muddled in details just yet.
So… what are we looking at then? Well, when writing a document, you save a text file - when making a digital picture, you save an image. In Unity, we create ‘scenes’. Scenes are bascially collections of things appearing in our project. We need at least one, but can have many! These are saved as .unity files. In general, one of these is always open, and one has been created by default for you.
Now lets have a look at 7 key areas in the default unity editor layout.
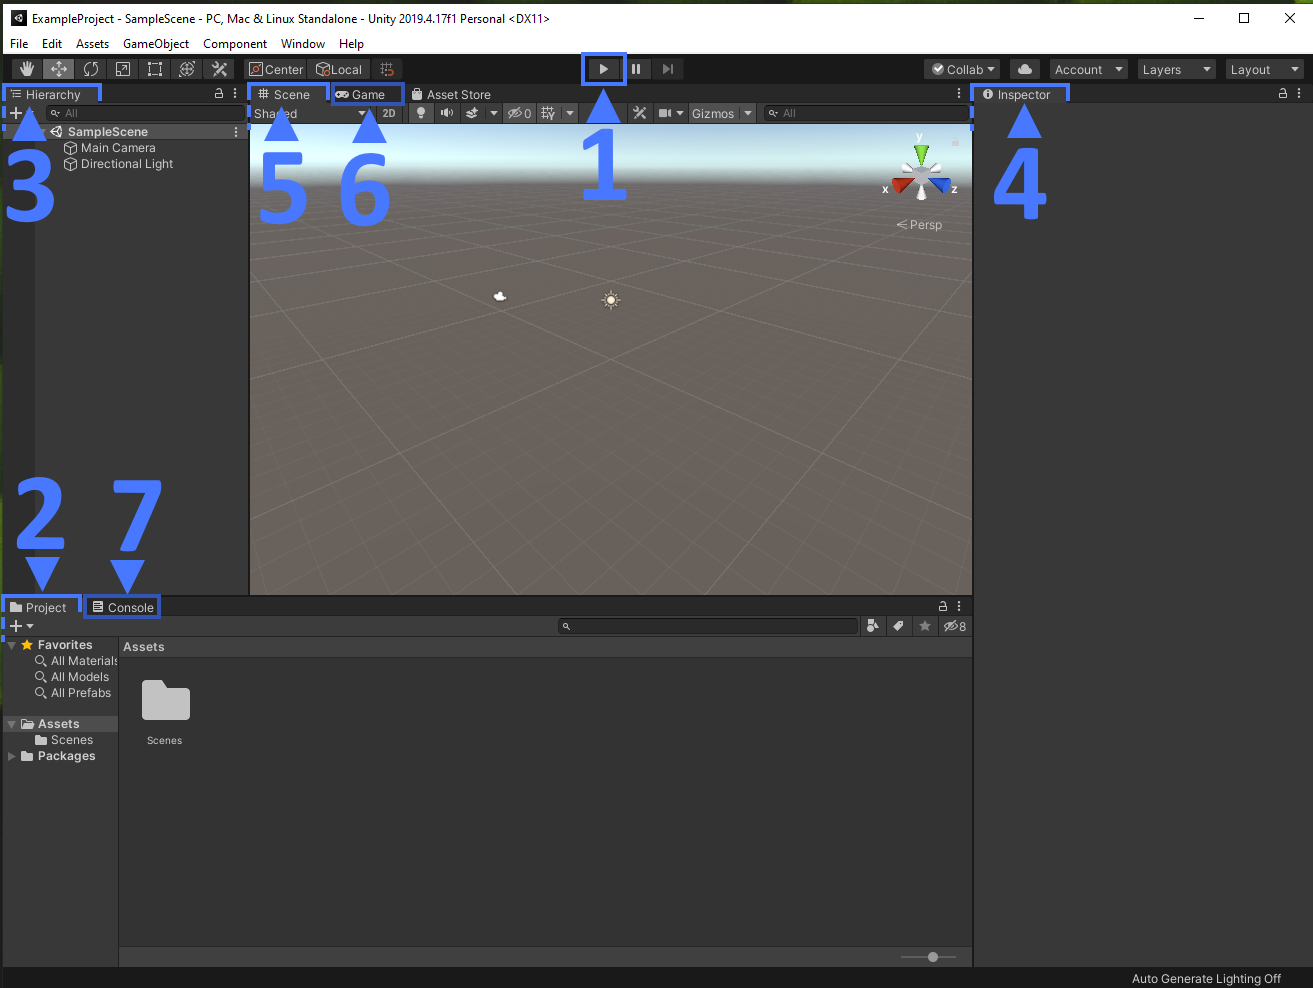
- Play button: How to start playing/running your game. The entire unity editor gets darker when you’re playing the game, and in general, changes you make to the scene while playing don’t save!
- Project tab: Games are made of many assets - art, sounds, text, models, scripts, etc - and we need to be able to find them! This is basically just like your window explorer on your desktop, but for the project. You can use it to open scenes or edit / view other assets by double-clicking.
- Hierarchy: Scenes are collections of items… but what items are in the scene you’re currently working on? Well, this is the full list of things in the scene - Specifically, Game Objects in the scene. A Game Object is a mini collection of stuff: Code that manipulates things in the scene, and Data associated with the object. Selecting one of these line items brings up its details in the inspector.
- Inspector: Try selecting one of the line items in the Hierarchy, like Main Camera. You’ll notice the insepctor now has stuff in it! These are the mini collections of scripts or data that make up a Game Object - we call these Components. The Components can be either hand authored or provided by Unity. Every Game Object in Unity has to have a
Transformcomponent, so it’s provided by default on all GameObjects you create or that are provided and can’t be removed. - Scene View: Usually referred to as the
Scene, this is where you can edit your game world in physical space while it’s not running (or temporarily while running, tho changes will revert when you stop), and is the visual representation of the things in the Hierarchy. you can think of this as the behind-the-scenes developer view. - Game View: This is what the player sees and experiences while playing your game! This tab is usually automatically switched to when you click on the play button, and exited when you click on play again to stop running the game. When you want to play your game to test it, this is where you head.
- Console: If things go wrong in the game or there’s a message for you, Unity will put it here. Custom scripts can write messages here too!
I fully expect that this may need to be referenced multiple times, so while I’m creating a cheat sheet, here’s some common vocabulary you may see if you search around for tutorials or look for Unity documentation.
- The Editor is the big window open right now, containing those 7 sections of note above.
- Unity Project referrs to a collection of Assets and Scenes, stored as a folder on your hard drive. The editor can only edit one unity project at a time.
- Assets are the things in your project, and are separate files on your hard drive. This is stuff like art, code, or sounds.
- Scenes are collections of Game Objects that can be loaded or unloaded while the game is running.
- Game Objects are collections of Assets and Components with a name. These make up your scenes.
- Components are representations of either Code (Scripts) or Data. This data can be assets or values.
I skimmed over a lot of buttons and menus, but they’re not necessarily needed up front if you’re interested in writing code - but what better way to learn than by pressing them! As a heads up, some windows and buttons don’t do anything unless you have an object selected in the hierarchy or scene, so you’ll want to be sure you have something selected before clicking about. Most buttons have to do with manipuating items you’ve selected in the scene - resizing, rotating, or moving.
Congratulations, you’ve now got Unity installed and you’re ready to take your first steps!
If you have a little programming experience, I’d check out some of the other posts on this website. You may find that starting to write code is one of the best ways to learn about interacting! If you’re looking for more info on the editor and its sections, checking out Unity’s website, or other tutorials which cover some of the vocabulary and sections above in greater detail.
Copyright © 2019-2020 Loam LLC - all rights reserved. Trademarks belong to their respective owners.